 |
| This Alfred Munnings painting, Fox hunting Fox Hunt, closely resembles how I imagine Nate's trips. |
This year is different. My friend Janet is a fellow enthusiast of all things natural. She kindly sent me the instructions on how to tan a rabbit hide using fairly basic materials. She has even gone so far as to drop off the required type of pickling salt.
This process takes 1.5-2.5 weeks, so I'll have to update this post as it goes. I could wait until it is complete before posting, but I'd hate to leave my one reader, Anne, to wonder what I am up to.
Part One: Pickling
These instructions assume that you're tanning a fresh-off-the-animal hide, when the skin is still soft and pliable. That's not the case with this rabbit. The bloody mess has been hanging in the basement stairwell for months, and has stiffened into the shape of the hook it was on.
 |
| Bloody rabbit pelt. A fearsome thing to behold. |
 |
| Spoon of Rabbit pelt |
It doesn't need to be sea salt, and it certainly doesn't need to be this expensive brand of sea salt, but its what I had on hand. It just has to be non-iodized. The Alum salt came from the Bulk Barn. The solution had to be mixed in a plastic bucket rather than metal, to avoid a chemical reaction. Sarah (who mops my floors) will have to be warned before she goes after that bucket.
To be continued...
Part Two: Fleshing (what an awful word)
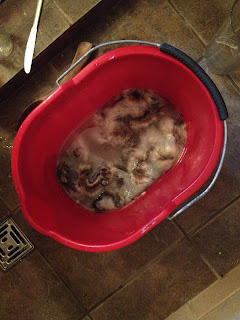
The rabbit has been pickling for three days now. I saved the pickling solution, because it is reused later in these instructions.
I squeezed the excess solution out and rinsed it with my cloth diaper sprayer. I realize not everyone who tans hides will have a diaper sprayer.
 |
| Rinsing with Bum Genius diaper sprayer |
 |
| Fur looks better than when I started! |
 |
| Note the flap of membrane that is peeled up - the entire hide gets peeled |
 |
| After "fleshing" |
This time, the rabbit stays in for 1-2 weeks, getting stirred twice daily.
When looking for videos of fleshing hides I came across this guy. He uses a dry salt rub instead of pickling and I just couldn't get enough of his fantastic accent.
To be continued...
Part Three: Washing and Drying
Our little friend has been pickling for one week. Now the solution is dumped and the excess squeezed from the pelt.
I noticed loose fur floating in the water, and am hoping its just from the few patches that I fleshed too far.
The next step is to wash the pelt with a gentle detergent. The image of oil covered ducks popped into my mind, and so blue Dawn it is. I am surprised at how greasy my hands got from squeezing the water out, but the fleshing and pickling is done to remove fat from the pelt, so it makes sense.
The pelt is rinsed several times, the water squeezed out, and it is hung to dry for a day, before it is softened and conditioned.
To be continued...
Part Four: Stretching and Conditioning
The pelt has dried out for 2 days, and has once again shrivelled into a hard, ugly mess. On closer inspection of the instructions, I was supposed to stretch and condition the pelt while it was still damp.
No need for alarm - the pelt can be "dampened back" with a wet cloth. Once damp, I began gently tugging and stretching the skin. You can see the white areas are where I tugged. The goal is for the whole pelt to achieve the white colour.
There were still some hard, dark areas, so I laid a damp cloth on again to soften it up more.
Once the pelt was all stretched, it softened up quite a bit. There was still a peppery feel to the hide - hopefully that will go away after being conditioned with leather oil.
Well, this feels like an anti-climactic ending to a two-week long posting, but the tanning is complete! Once the greasiness of the leather conditioner fades, I'll be chopping this fellow up and sewing him into fashionable accessories that I will be sure to share with you. I feel like the villainous woman from the 1988 hit series The Smoggies, in declaring such - but rest assured Suntots, Mr. Rabbit died an instantaneous death, and was gobbled up over a wholesome family dinner.


